Organizing a Tiny Kitchen Pantry
This week is the week the girls were supposed to go back to school after Christmas Break. It is a week I always look forward to with great anticipation since I don’t usually have to go back to work for another week or two. It’s nice to get a lot of quick organizing projects done during this time to get ready to hit the ground running at work.
Well, wouldn’t you know it, the girls have not gone back to school yet due to the Arctic Vortex that is bringing us sub-zero temperatures and wind chills of around negative 40. They’ve been off for two days, and yesterday I got nothing done. Today, I pushed through and I actually got the pantry organized, but not much else. So far, it looks like they will be in school tomorrow, but who knows?
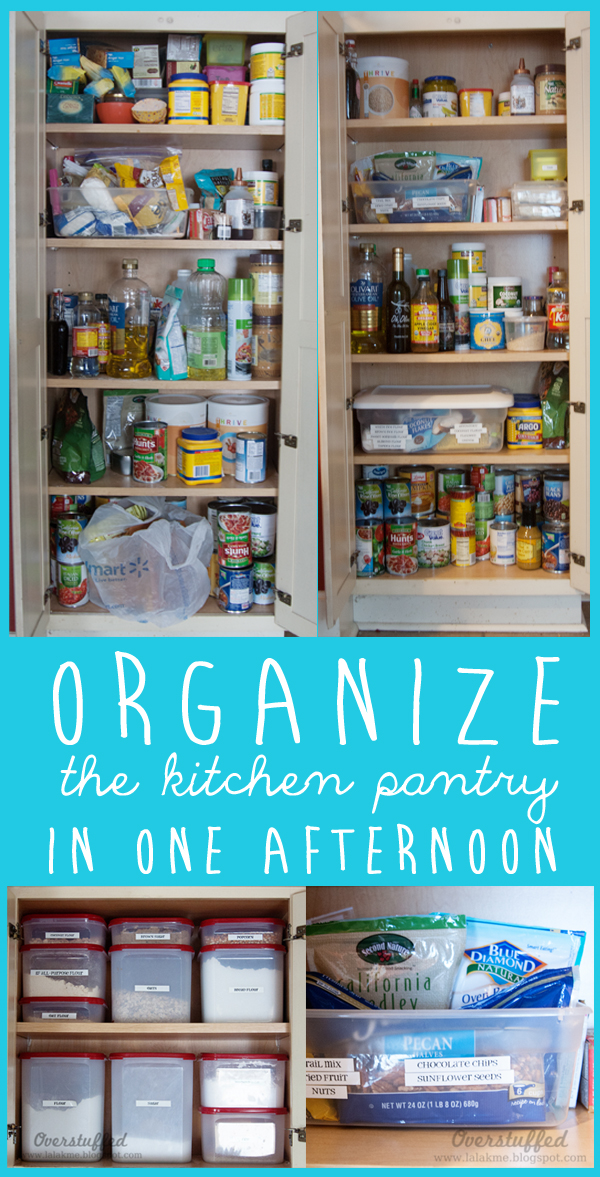
Anyway, here’s what my kitchen pantry looked like before my quick organizational overhaul:
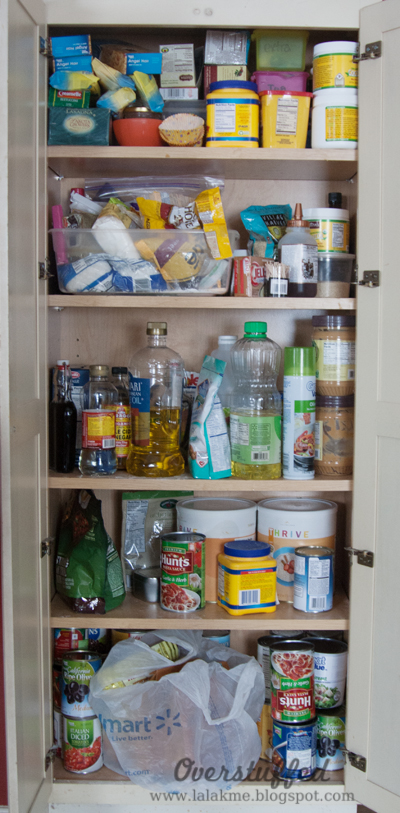
I live in an adorable 100+-year-old house. The kitchen has been fairly modernized, but, as is the case with super old homes like mine, there is not much storage space. My pantry consists of a tall cupboard in the corner. I keep more long-term food storage in a closet down in the basement, but because what I have in the actual kitchen is so small, it has been super difficult for me to keep it from turning into a giant mess all the time.
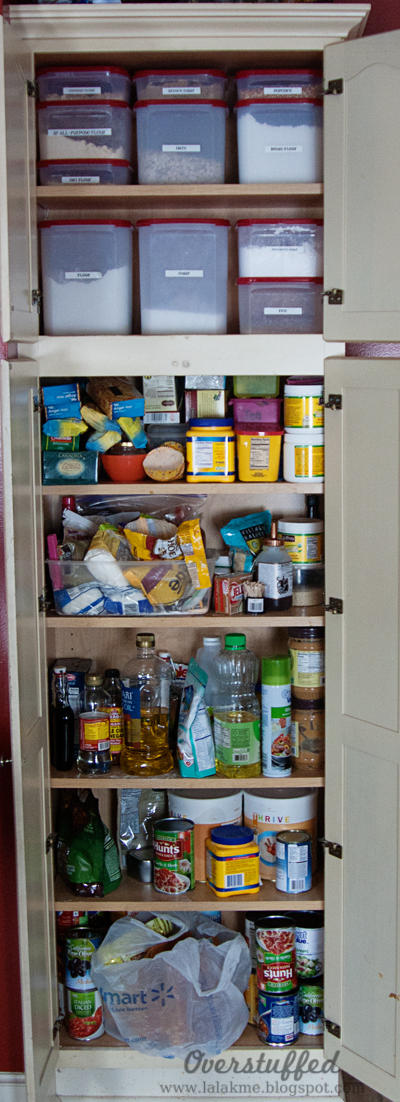
Last year in January, I organized the top part of the cupboard with Tupperware Modular Mates. I seriously love these things and usually try to buy a few new ones every January, because that is the only time that Tupperware actually puts them on sale.
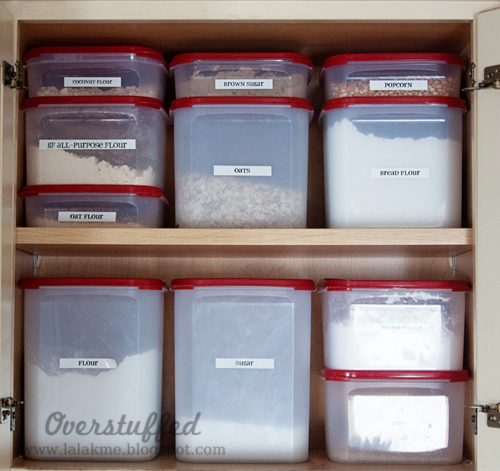
Together with the DYMO Label Maker, the Modular Mates look awesome in my pantry. It has managed to stay perfectly organized for a whole year! That’s a pretty big accomplishment for me.
Today, the first thing I did was pull everything out and give the shelves a good wipe down. Then I contemplated the categories of food and how I could put them back in some sort of organized manner.
The canned food was easy. We generally keep it on the bottom shelf (though I found a few stray cans hanging out on other shelves), so it went right back there.
I ended up moving the pasta to another cupboard. Since we have stopped purchasing commercial cereals entirely, the cupboard where they used to belong has been mostly empty. Things have started migrating over there when they wouldn’t fit in the pantry, but I decided it should be a boxed foods sort of place. We don’t buy many of them due to our mostly gluten-free status, but the ones we do buy tended to be the messiest in the pantry.
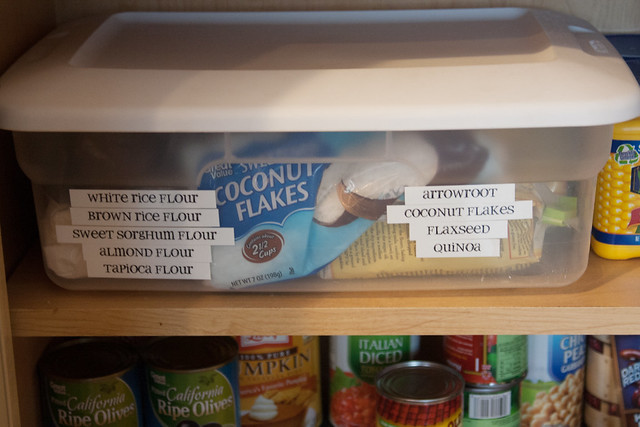
Speaking of being gluten-free, the amount of random flours we have in our pantry has grown quite a bit. I do keep some Gluten-Free All-Purpose Flour in the Modular Mates on the top, as well as some other oft used GF flours, but I have a bunch more hanging out in bags in the pantry and the freezer. I found an empty small storage tub and stuffed all the flour and a few other similar items into it. Then I labeled it up so things can be easily found (one of my favorite things about my label maker is that I can use any font I have on my computer).
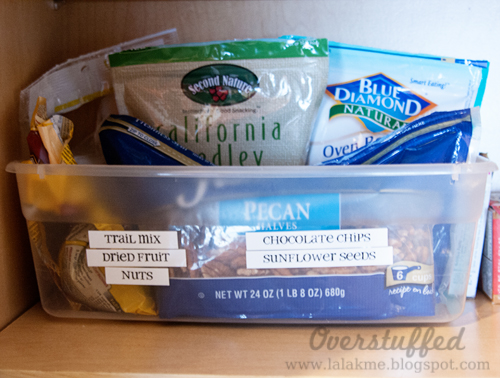
I used a smaller storage tub without its lid for things like chocolate chips and nuts. These are the things that are constantly spilling all over the place, so hopefully this idea will contain them a little better.
For the rest, I just tried to make sense of it all. For instance, oils, vinegars, and a few other random things in similar jars are all on one shelf. Things we use most often, such as peanut butter, cocoa, and honey are all on the top shelf.
And this is what my tiny little pantry looks like now:
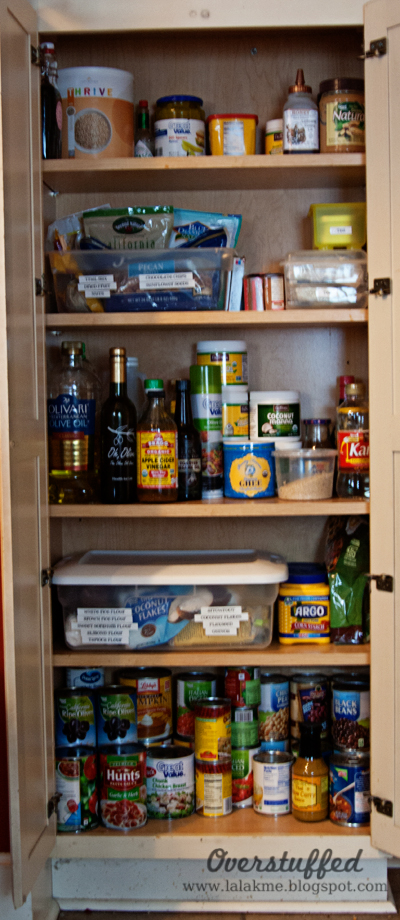
So much better! Here’s to hoping we can keep it organized with minimal upkeep.
Cost: Absolutely nothing (The tubs I used I had on hand already, but the cost would probably be $7-10 for both of them.)
Time Spent: Approximately an hour and a half.
